I came across this really interesting sun-catcher on ![]() . I love this site! I love sharing on it and I love to find nifty little creations that I can do at home myself. As you all I know I love to craft anything I can get my hands on. My first day on Pinterest I thought I was losing my eyesight, I was soooooo addicted to pinning that my eyes were burning. I think I woke up with a Pinterest hangover. If you haven’t tried Pinterest, then I suggest you check it out!
. I love this site! I love sharing on it and I love to find nifty little creations that I can do at home myself. As you all I know I love to craft anything I can get my hands on. My first day on Pinterest I thought I was losing my eyesight, I was soooooo addicted to pinning that my eyes were burning. I think I woke up with a Pinterest hangover. If you haven’t tried Pinterest, then I suggest you check it out!
So anyhoo, back to my crafting experience. I found this awesome picture:
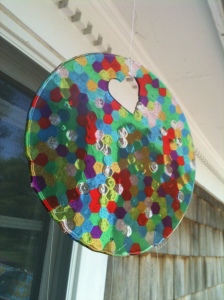
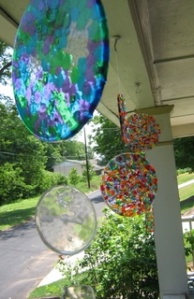
I thought, wow, so pretty! It must be complicated right? NOT SO!!!! VERY, VERY simple I promise. You buy the clear-ish plastic pony beads form the craft store, I just so happened to have some from my hair braiding days, or I’m sure you could use any clear plastic beads. You dump them into a round non-stick cake pan in a SINGLE layer, no greasing necessary (yes this made me nervous) and bake them in the oven on 400 for about 20 minutes. My oven took closer to 30 minutes, but it also depends on what kind of effect you want to have I suppose. The less time you cook them for the bumpier they are. I prefer them a little smoother so I kept checking them every 5 minutes after the 20 passed. As you can see, some melted differently. The clear ones still looked a little bumpy, but I was happy with it.
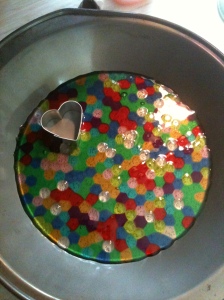
***NOTE, this does smell a little in the house so if you are bothered by melting plastic smells, I wouldn’t do this in your house. Maybe purchase a toaster oven that you could put outside?? I don’t know, but I know some people complain of the smell. It really didn’t bother me. I suppose if I was doing this as a full time job I would pick up an old oven and keep it in a shed or garage to bake in. But one time isn’t going to kill me. AND ANOTHER NOTE **** Just because I wasn’t sure how this was going to turn out, I went yard sale-ing for pans and paid .25 each. I didn’t want to use my own in case they got ruined, but I also don’t want to melt plastics in them and then cook food in them if you know what I mean. I’m not one of those nutty people who freak out over all things plastic, it just seemed weird to me, so I’m keeping separate pans for craft stuff.
So once the baked beads cool, flip the pan over and the plastic”cake” falls right out! No more worries about not greasing the pans. Woo-hoo!! I am so excited about this silly little NEW thing! Why didn’t I think of this?
After baking the first plastic cake, I was hooked. I got so many ideas! Now the original instructions said that you can drill holes in the sun catchers wherever you want them. Again this made me nervous thinking the plastic would easily crack, so on the first sun catcher I put a heart shaped metal cookie cutter [you can see in the picture above] at the top thinking I would make my own hole. The cookie cutter DID NOT pop out so easily. It was actually pretty well-stuck in there. I had to perform serious wiggling tactics to remove it. Finally it came out, so not too bad but I won’t try that again.
I thought I would make some smaller plastic cakes to hang as little dangles from my big one. So I took these muffin pans I also yard saled for a quarter each and put some beads in them ready to bake. This time I used a rivet for my holes (you can see the rivet in the pre-baking picture below) to see how this would come out, knowing I was going to leave them in as decoration. Now I didn’t realize that the cupcake pans were not completely non-stick coated like the cake pan was so I had to really pop the bottom of the cups to remove my cakes. I also noticed a “texture” on the bottom of the cakes from the pan and I could also see very tiny scratches. So note that any imperfections in the pans MAY be noticeable in your sun-catchers.
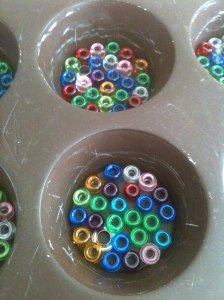
So I now have one big sun-catcher, and 6 small ones. I imagined my sun-catcher with 3 long dangling strands each with 2 small ones on them. I realized that I have 6 circles with one hole each, and my big circle only had my top hole shaped like a heart. Oh boy. I HAD to break out my drill and proceeded to drill 3 holes in the bottom of the big sun catcher, and one hole in each of only 3 of the small ones. The ones hanging on the bottom of the strands only needed the top holes with the rivets. It really wasn’t that bad. No major cracking when I did the drilling. Next time I will not be worried to drill the holes later, but that won’t stop me from thinking of other creative ways of making cool shapes for holes.
NEXT STEP—I creeped into the shed —real sneaky-like—-and stole some of my hubby’s fishing line…..I couldn’t find any new packages, so I just took it right from the reel. HEHEHEEEEE, yes clever isn’t it? Fishing line is perfect for this project and if you have a hubby that likes to fish it’s probably something you have laying around the house—one less thing to buy, LOVE it!
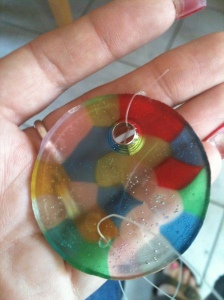
I tied all the pieces together exactly where I wanted them and VOILA!!! ***Tip- I dangled mine from the table so I could see exactly where I wanted to place them.
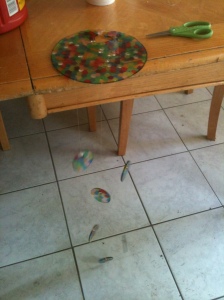
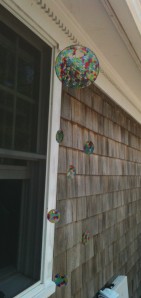
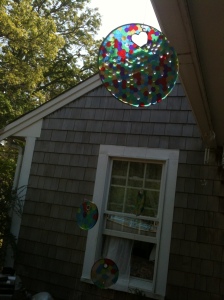
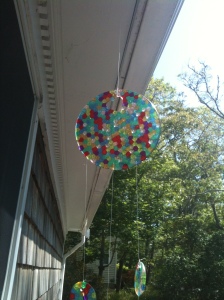
So my picture-taking skills aren’t so great, but you get the picture (no pun intended). I love this new creation and I have so many ideas that come with it! I could make different shapes, I could put different non-clear items within them before baking, I could even make wind chimes. I can separate colors and make them one or a few certain colors each. I can make swirls or patterns with the beads before I bake them….It just goes to show how flexible some crafts are. No one says you HAVE to follow the directions to the “T.” I liked mine sun-catcher longer, I did that on purpose. You could make yours shorter, or put more small pieces on it. Have fun with it, make it your own. Send me pictures!!! I wanna see what you come up with!
Please visit me on Etsy and LIKE my page on Facebook to keep up with me!
I tried this and doesnt matter how long it in for it goes bubbly and if i lower the temp it just goes hard again. Can i use any plastic beads or do i have to use those big ones like yours?
I think any plastic beads. We have experimented with different beads styles too… Some clear some not. Its kinda fun. You never know what you are going to get. Sometimes it fails? Snd sometimes you get something cool. We used some beads once that we thought were plastic but ended up being glass. Half of them fell off (the glass ones) and the other half, the plastic ones stayed on. We ended up with a cresent moon shape. It was cool! So experiment away!
Glass ? beads. maybe that would be the way you could lay / designs in . for ? initials ? . maybe…
Interesting idea.
Just found this on Pinterest and immediately pinned it. We have sold Pony Beads for years and never thought of this. We get so many broken ones from the manufacturer (we always try not to send them to customers) that we have bags of them. This would be perfect for those broken bits. We would love to add this to our craft forum and on our pony bead ideas page. We don’t do that without permission so hope you get this and allow us.
🙂 of course! I am not the original creator. My blog post includes a link to where i got the original idea. I think the link may not be there anymore…. But it was there when I originally posted this blogpost! I gave them credit too so its always nice.
Love it! We made the sun catcher and used the same idea with the cupcake pan to make small circle Christmas ornaments using green, red, and white beads. 🙂 We strung gold string through the drilled holes and hung them on our tree.
Oh I bet they look pretty with the lights! Like stained glass!!!!
I really want to try this and make one for my mother in law. I will just open the windows if the smell gets bad. But I was wondering, is there ever smoke? I just don’t want my smoke detector going off. Lol.
I have never seen actual smoke from these. Ive never set the detectors off!
Hiya, has anyone used a toaster oven to make these? Kx
I think someone else in my comments mentioned using a toaster oven outdoors? Sounds like a neat idea if you want to avoid smelly stuff. :))) I’ll have to read through the old comments!
Yes I used my toaster oven for 2….worked great, smoked a little, but smell of burning beads is potent!!!! Good luck
I have made only a couple of these, but I FINALLY found some clear ones (the ones I used the first time was from beads I had) Even a Christmas time I had a VERY hard time finding them at the stores you would expect to have them. I am now going to make Christmas ones, and for the guys am going to make their sports team letters for example Michigan State is green and white. I will make the letters green, and then fill in with clear. Choose how you want to do it. Also do a family one with the beginning letter of their last name. Could also make small “dangles” with family members first name. No end to the ideas. Love it. thank you
Yay! Thats awesome to hear— and i love the ideas. The possibilities are really endless! 🎄
I want to make these for a birthday party craft. Has anyone used disposable aluminum pans? And on the grill? I don’t want my house to smell.
I bought pans from a yard sale so thst i didnt have to use them for food too– i think some people here have used a grill. Check out the comments!!! :)))
Has anyone tried adding glitter to these somehow? These would be super cute as patches of “ice” for my little girl’s princess party…
I havent put glitter in mine, but I have used the transparent pony beads that have glitter inside them already. 🙂
I make these all the time. I use a toaster oven and use a variety of pans. My favorite is the small round glass Pyrex. I tried the tin throw away pans and they didn’t work to well.
Im glad to hear of someone who uses a toaster oven for this, as i am often asked that question. 🙂
Just saw this and want to try it . I’m going to try a heart shaped pan to make Valentines suncatchers for my grand kids! Wish me luck!
What happens if I don’t use a non stick pan? Do I need to use parchment paper?
Grease proof paper works Kx
I am not sure how the plastic will do on parchment paper. It might just melt the paper??? I honestly have no idea. I reccomend a non-stick pan. Thats all I have tried, personally.
If parchment paper is greaseproof paper – the stuff used in baking – then it works without any problems It was suggested else where & I used it on top of my non – stick pan before placing the beads on it. I melted my beads in my regular gas oven & the only thing that happened was the paper got darker every time I used it but it still did the job & acted as a non – stick layer The melted designs just lift right off it Kx
Hi guys,
I just did mine in my gas oven, the smell was not as bad as I expected so I am happy to continue doing it this way
I ordered a load of pony beads before Christmas – pearl & glitter ones as well as clear & they all work really well
The plan had been for my husband to drill holes in them but the are far harder than we expected & very difficult to drill through! So I have ordered some metal beads & I will let you know how I get on with these
Kx
Great!
I did not gave trouble drilling them at all?? Im sorry you had trouble.
As fir the metal beads, if they really are metal they will not melt, but if you surround them with plastic ones you can grt them to stick into the design in a unique way. If they are “metallic” beads some of them melt ok, some are a little tougher if they have a heavier metal content.
🙂
A link to my Pinterest board:
http://www.pinterest.com/ginger1880/my-pony-bead-creations/
I have never made these but cant wait to try… After reading the comment about someone using this to make christmas ornaments (great idea!!) i had a thought- it would be very cool to make a snowman for winter & christmas! You could use 3 different round pans in different sizes & tie them together when done baking! Just use different color beads for the face, buttons, scarf, etc… How fun! And depending on pan size you could do a large snowman to hang somewhere or a smaller one for the tree maybe? As you & others have said, i love that the possibilities are endless with this craft! Cant wait to try!!
Awesome! You will have so mych fun with thus— i can see you crafty brain thinking already!
I just made these with my daughter – we had so much fun! I used metal grommets to make the holes. They’re small enough to leave in the sun catcher without making a difference.
On another board someone used their bbq to cook the beads and that worked really well.
When I made these with my daughter, I didn’t have a drill to make holes. I used a chopstick! As soon as they came out of the oven, I pushed the tip of a chopstick where I wanted the hole, all the way down to the pan bottom, then I just gave it a quick twirl and moved on to the next one. You have to work quickly, because they start cooling immediately. The plastic is not hot enough to refill the hole when you move the chopstick, and it makes a nice hole, without any drilling. 🙂
That is an awesome tip!!!!! Thank you so much!!!!!
How I make the holes in mine is, I have a very small pair of vise grips and I get a nail the size that I want to make the hole and I clamp it in my vise grips very tight and I use a torch and heat up the nail and poke my hole. (If you do not have a torch you can use a gas stove burner).
Thanks for this tip! I have heard of others doing this as well!
I loved making these, mistakes and stench and all, thanks.
You can see here my process and results:
http://eskimokiss.es/blogs/eskimo-kisses-point-of-view/18993239-3-generations-in-bed
I loved making these, mistakes and stench and all, thanks for the great post.
You can see here my process and results
This time the correct link
http://eskimokiss.es/blogs/eskimo-kisses-point-of-view/18993471-creative-monday-experiments
I love that you experimented! That’s how we all get to these places after all—:) what would art be without experiments? It looks like you had fun with it.
I used a silicone cake pan and put my beads in it…worked great!
This is so good to hear! I have had many people ask me if this would work or not! :))) Thanks for this update!
Please, please be very careful if you do this. They are very lovely but the fumes are extremely toxic. 🙂
My question was if I could use a glass bead to make the hole but I guess that has already been addressed ( they fall out)! I just ordered a bunch of different beads and cannot wait to try making these. Wonderful summer craft as I have an old table top oven that I use for crafts and it can be taken outside for the summer.
I really appreciate all your tips and all the feedback from others. It sure makes it easier for me now!! I wonder if anyone has tried using opaque beads in with the clear ones to create a design??
Hi—- yes! Use glass beads for the hole if you wish— they will fall out! If you use tiny glass seed beads you will get a cool effect where you will have a jagged hole— some of the beads will be “stuck” in the melted plastic and the rest falls out. 🙂
And I have tried some opaque beads as well— mix and match. Have fun with it! My kids used some solid colored ones to create a design.
Not sure if I overlooked this part of the directions or not…what temperature and how long do I bake them?
I haven’t made one in a while— but I did put the instructions up there. I have to look back and read— I’m currently mobile. But I think it’s 350 or 400? And 20-30 minutes. I believe, but please read back through to double check.
Oh, never mind about my last post about how long to bake them. I had not scrolled to the very top of the post.sorry!
Got it! Lol!
has anyone tried silicone baking pans?
Cooking plastic relates lots and lots of toxins. Keep your house well ventilated when doing this.
Now to find a cross pan. Wouldn’t that be lovely- like stained glass. Would be great sellers for vendir fairs
Sorry vendor fairs
Has anyone ever tried to do this with fuse beads?
Afternoon
I tried to make the suncatcher with melting beads as instructed, a hour and a half later i was still waiting for them to melt. Some lost their color but that was it. I eventually gave up.
I can tell you I have used some different kinds of plastic beads that did NOT melt so well. 😦 make sure you are using just basic plastic pony beads… Like the kind kids will use in your hair. And also that the temp is correct on your oven, and oven is working properly. I know it sounds funny, not trying to be rude— just have to say that because you never know! 😉 don’t give up. Try a different kind of beads. I bet it’s the kind of plastic.
you should be using a muffin pan with a non stick (Teflon) coating. I have never tried this otherwise! When the plastic cools it shrinks a little and pulls away from the edge. You can hear it almost crack sometimes as it cools and pulls away. It’s kinda funny. Don’t try to pull it away until it’s cool. It will just fall right out. I’ve never had a problem. (The only ones I have read that might have had problems were not non stick or disposable foil things. )
Can you place the beads right into the muffin pan, or do you have to spray or lay something down?
This is a great idea and a beautiful craft to make.
I have one suggestion:
Please caution anyone with pet birds not to bake these in the house where the birds are kept. The fumes from the non stick bakeware are toxic to birds and I imagine the fumes from the plastic beads may be as well.
Thank you.
That smell you get from the pony beads melting is toxic. They weren’t made for melting. It’s better to use ones like the Perle beads that are intended for melting.
Pretty darn cool idea. I love, love, love, it. And you’re so right about Pinterest addiction. There are so many craft ideas it makes me dizzy. Thanks for sharing.
I love making these and so do the grandchildren. We have actually done them with #1 DAD in beads and #1 MOM for the kids to give to their parents. If you don’t want to use it as a sun catcher they make great trivets for hot food bowls. I melt mine outside in the electric roster oven .
Hi can u use hama beads to do this as I have glitter, clear, neon and all sorts of colours and I would like to learn to do this.
I hope someone can tell me
Thank u
I’ve never heard of them specifically— but you could always experiment and try it out? If they melt it’s worth a shot. I tried a bunch of different beads. Some melted at different temperatures than others. 🙂
Hama is like perler beads.
I used a muffin pan I got from my local Dollar Tree store, and they also carry the Pony Beads. I’ve made them with the clear beads, mixed color beads, and pearlized beads. They all worked very well. I had a toaster oven that I moved out to the garage to use (where I kept the door up about a foot), but a patio would work just as well. The direction you lay the beads in the pans has a surprising effect on the final piece. Mine were less bumpy when the beads were laid on their sides; this takes a few more beads, and the finished piece will be just slightly thicker. I would caution against using glitter, because most glitter is metallic and may discolor your finished piece. The penalized beads will give you the same effect, if not quite as dramatic. I’ve had a lot of fun with this easy new hobby, and have passed the tips and tricks along to all my friends. I found a Pinterest article on these sun-catchers in May, just before the end of the school year when my friends were wondering what activities they could do with their grandkids during the summer while they were helping with daycare (yes, I am of THAT age!). With the supplies and pans available for only a couple of dollars, it’s cheaper than most new coloring books, and gives you good quality time with your young family members. Have fun and display your pieces with pride! I’ve taken lots of pictures of all my successes and failures, so I can document my progress.
PLEASE! If you have birds in your home, DO NOT try this inside The fumes may or may not affect you, but they may kill your birds. Birds have very sensitive respiratory systems. Even using a Teflon-coated light bulb will kill birds in an enclosed space. If you don’t believe this, do a Google search to get the facts.
How many bags did it take to fill a cake pan, and was it a 8 or 9 inch pan?? Thanks amillion. Eva
I generally buy a bag of 500+ beads so I have a mix? But I never used them all. I’m sorry I didn’t count them.
Do you wait till they are completely cool to remove from cookie cutters or do you want it a little warm to come out easier?
I wait until everything is cool until I touch it! The plastic separates from the metal easier. 😉
Tried these and they came out nice, except fir one. I tried using a metal cookie cutter in the middle of the
Bigger one and when it was done the cookie cutter wouldnt come out. Should I have used pam spray on it
Sounds like fun. My grandchildren are over the age of 20. Doubt we will do this together. BUT…we started a tradition in 1990 with exchanging names and then you make a Christmas ornament for your exchanged name. It is amazing how many different ornament ideas everyone has. This would make an interesting challenging ornament for our exchange. Everyone tries to keep their idea secret so we never know until Christmas what everyone made. Thanks for the different variations people have come up with.
Do you think this would work with a microwave? Have you ever tried it? I didn’t want to use my new kitchen oven.
I’m not sure this would work with a microwave- and actually- I wouldn’t recommend it. My thoughts: first, you must use a metal, NON stick pan… so that leaves the microwave OUT. Second, if you were able to use a different kind of pan/ plastic ware? They don’t melt in the micro wave because that’s not exactly what the microwave is meant to do- it’s meant to not melt plastic, only heat food, and even IF it did the fumes building up inside the microwave would be completely overwhelming. All in all? I say No, I do not recommend this.
Some people use a toaster oven, or a grill. You can look up other tutorials on how to do this if you do not want to use your oven. Thanks for looking!